
20 May 2025

Last updated: December 2025
Written by: Kidddo team; with 10+ years working with churches and child check-in systems
Setting up a church check-in kiosk doesn’t need to be complicated, technical, or expensive.
Whether you’re serving a small children’s ministry or a growing church with multiple classrooms, the right check-in station setup can dramatically improve safety, reduce lines, and make families feel confident from the moment they arrive.
This guide walks you through how to set up a church check-in kiosk step by step - including software, hardware, layout tips, and optional label printing - in a way that works for real churches with real volunteers.
Table of Contents
What Is a Church Check-In Kiosk?
Why Churches Use Check-In Stations
What You Need to Set Up a Church Check-In Kiosk
Step-by-Step: How to Set Up a Church Check-In Station
Label Printing vs Paperless Check-In
Best Placement for Check-In Kiosks
Common Church Check-In Questions (FAQ)
Final Thoughts
What Is a Church Check-In Kiosk?
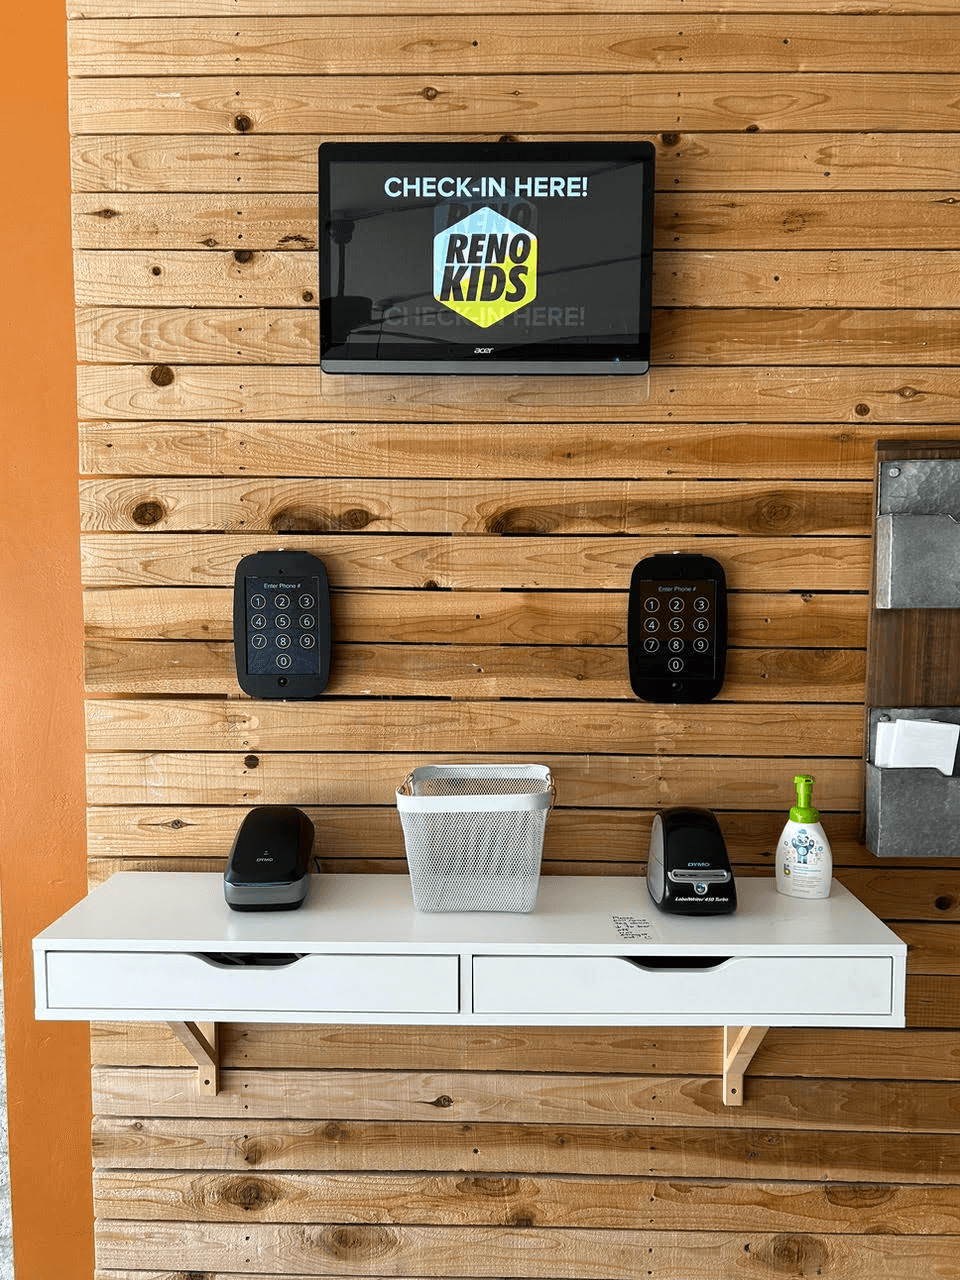
A church check-in kiosk is a self-serve station - usually a tablet or computer - that allows parents or volunteers to securely check children into church programs.
Most modern children’s ministry check-in kiosks use:
A tablet or computer
Check-in software running in kiosk mode
Optional printers for name labels or receipts
In simple terms: a check-in kiosk helps churches track attendance, verify authorized pickups, and keep kids safe - without slowing families down.
Why Churches Use Check-In Stations
Churches use check-in stations because they solve three common problems:
1. Faster Check-Ins
Parents can check kids in themselves or with light volunteer assistance, reducing long Sunday lines.
2. Better Child Safety
Secure check-in systems help ensure children are released only to approved guardians.
3. Less Volunteer Stress
Clear workflows mean volunteers don’t need to remember names, rooms, or policies.
A well-configured church check-in kiosk improves both safety and experience - without adding complexity.
What You Need to Set Up a Church Check-In Kiosk
1. Check-In Software with Kiosk Mode
Look for software that offers a true kiosk mode, meaning:
The device is locked to the check-in screen
Users can’t access other apps or settings
The flow is simple and guided
This is essential for churches where volunteers and parents may rotate weekly.
2. A Device (Tablet or Computer)
Most churches use:
iPads or Android tablets
Laptops or desktop computers (for staffed check-in stations)
The key is consistency - the device should stay dedicated to check-in only.
3. Optional Label Printer
If you want physical name tags, you’ll need a label printer.
Common uses for printed labels:
Child name + classroom
Security pickup codes
Allergy notes
(We’ll cover whether you actually need label printing below.)
Step-by-Step: How to Set Up a Church Check-In Station
Step 1: Create Your Check-In Flow
Decide:
Who checks kids in? (parents vs volunteers)
What information is required? (name, phone, allergies)
Do you want printed labels or digital receipts?
Start simple - you can always add fields later.
Step 2: Enable Kiosk Mode
Enable kiosk mode on your device so:
The screen stays on the check-in app
Accidental exits are prevented
Volunteers don’t need technical knowledge
This keeps check-in fast and consistent every week.
Step 3: Test the Full Check-In Experience
Before Sunday:
Run test check-ins
Print sample labels (if enabled)
Walk through the process as a first-time visitor
If someone unfamiliar with the system can check in without help, you’re ready.
Label Printing vs Paperless Check-In
Churches often ask: Do we need printed labels?
The answer depends on your ministry size and preferences.
Option 1: Label Printing
Best for churches that want:
Visible name tags
Matching pickup codes
Allergy indicators
Printed labels can increase confidence, especially for newer families.
Option 2: Paperless (SMS or Digital Receipts)
Best for churches that want:
Less equipment
Faster setup
Minimal volunteer oversight
Digital check-in receipts sent by text can fully replace physical labels for many ministries.
A flexible church check-in system lets you switch between printed labels and paperless check-in as your needs change.
Where to Place Your Church Check-In Kiosk
Location matters more than most churches expect.
Best practices:
Place kiosks before hallways or classrooms
Keep them visible, well-lit, and uncluttered
Leave space for brief queues
If possible, use multiple check-in stations rather than one crowded desk.
Common Church Check-In Questions (FAQ)
How many check-in stations does a church need?
Most churches start with one station per 30–50 children, depending on arrival patterns.
Can parents check kids in themselves?
Yes. Self-serve check-in kiosks reduce volunteer workload and speed up arrivals. Some check-in systems also allow for parents to check kids in via their own mobile phones.
What if a church doesn’t want printers?
Paperless check-in using SMS receipts works well for many children’s ministries and eliminates printer issues entirely.
Is check-in software difficult to set up?
Modern systems are designed for non-technical users. Most churches can set up a basic check-in kiosk in under an hour.
Final Thoughts: Keep It Simple
The best church check-in kiosk setup is the one volunteers understand, parents trust, and kids barely notice.
You don’t need:
Complicated hardware
Technical expertise
Long training sessions
You do need:
Clear workflows
Simple screens
Flexible options as your ministry grows
If you want a system that supports kiosk mode, optional label printing, and paperless check-in - without complexity - that’s exactly what Kidddo was built for.